
The credit for this unusual idea goes to Math Giraffe and the Tactile Formula Project . Here’s how it played out in my 9th grade Algebra I classroom.
The challenge? Making Exponential Formulas out of concrete images
I believe the lesson is applicable with any formula and any level of student. Try it yourself… how well do you understand the formulas you teach?
The Lesson
I started by telling the students about ‘this cool idea I saw on the internet’.
The idea is to create formulas out of three dimensional objects, like candy or pennies, or legos, or cubes, or squares that suggest or seem to define the elements in a formula. I didn’t have the luxury of time to collect objects, so I told my students to use drawings of items that they planned to use to make the elements.
To get the creative juices flowing, I shared the images from the Math Giraffe blogpost, and started the conversation about what I saw in the images. The students quickly started noticing and interpreting what they saw in the images, and questioning why students used some of the images in the examples. Some students began interjecting their own ideas for images they would have used. This really primed the pump, so to speak, for the formulas we were going to interpret.

Images from Brigid’s Math Giraffe blog post.
Brigid, of Math Giraffe, used the classic slope-intercept formula,
y = mx + b
well known to my students. The task for my students was to do this with the multiple versions of the exponential formula:

I wrote all of the different forms of exponential formulas on the board, and let each student choose the formula they wanted to use for their visual interpretation. What followed was a deeply enriching -and eye-opening – mathematical and conceptual conversation among all of my students!
Note: We used exponential formulas, but any formula would work with this activity.
The challenge for my students was using pictures to relay the action contained in the formula elements vs just using a picture that looked like an item in the formula. An example of this was incorrectly using bananas for parentheses, because, as the student explained, “they looked like parentheses.”
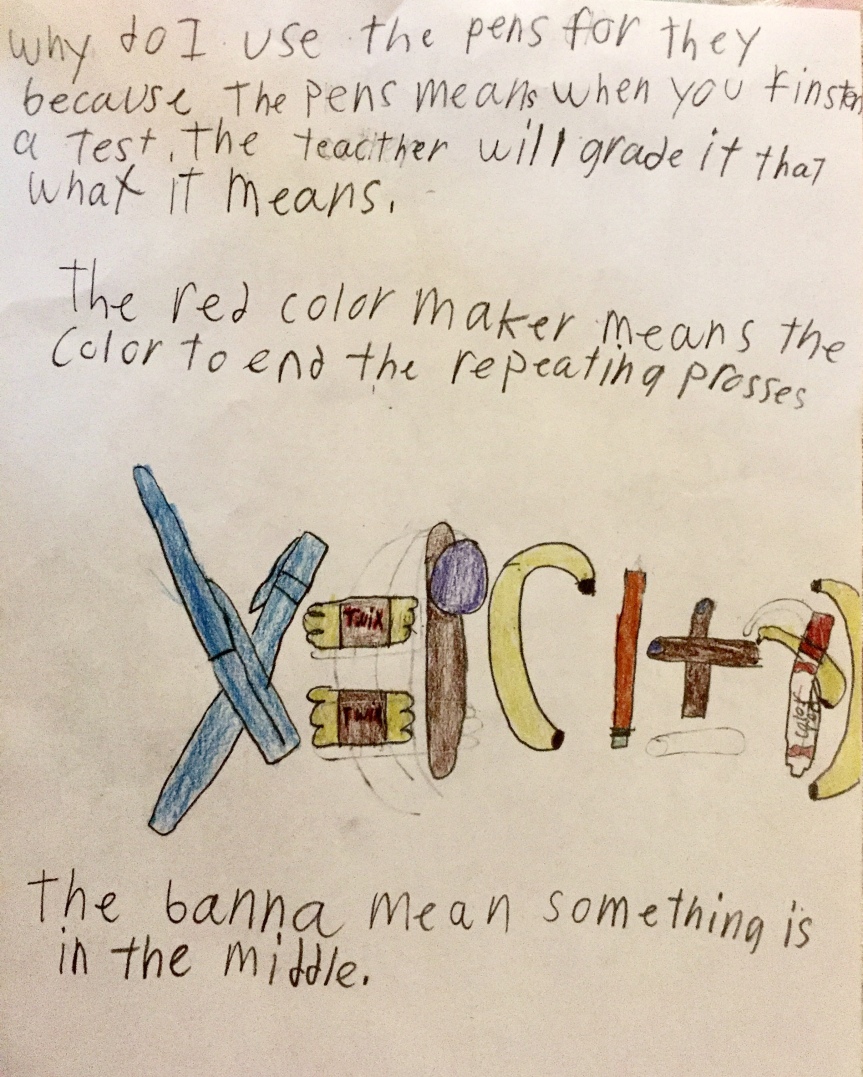
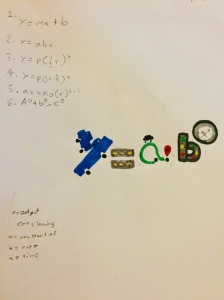
This student was just a little shaky on choosing an item that revealed the inclusive nature of the parentheses. Another student didn’t use any pictures at all. He wrote out his formula using a color for each letter, basically color-coding the identity of each element in the formula with an elaborate system for understanding each part:

Did they miss the point? Absolutely not! Both were much more able to explain when and how to use the formula after this task.
This task got my students thinking more deeply about the formula itself, than just trying to memorize when to use it!
Interestingly, the exponential growth element was mostly identified as time, with one child drawing a clock face whose hands illustrated the exponent variable.


I noticed that after this exercise, students were beginning to talk about the formulas by identifying individual elements and their actions. When explaining why representational items were chosen, students were recalling examples from word and story problems from our practice work.
Research (source articles noted below) shows the value of connecting the abstract ideas of math to concrete items and has been proven to help with retaining the material. In this lesson, connecting physical objects (or in this case, drawing pictures of physical objects) allowed my students to make clear connections to what the formula was representing. More than that, this exercise functioned as a valuable informal assessment for me about what my students really understood about the elements and actions of the formulas we were learning. I look forward to using this task again!
